Hank of Yarn Tied in a Big Knot
Oooooh, you're excited! You just bought a new skein of embroidery thread!
You can't wait to try it for the first time!
You take it home.
You cut into it.
You pull a strand, you cut a piece, you stitch a bit, and you reach for the skein again.
Where is that dagblasted end?!
You find it. You pull. And then it happens.
A Nightmare Mass of interlocking, intertwining, interconnected, angry thread mushrooms forth with every inch you pull from the skein.
Excitement turns quickly to consternation, and consternation to downright frustration.
Before you know it, you've got a huge, convoluted jumble of thread rupturing from your lap.
I'm guessing this has probably happened to you before. I know it's happened to me more times than I can count. And it's always frustrating!
You might think my scenario is exaggerated. But it's not! And it's especially likely when you handle a large skein (or hank) of floche embroidery thread for the first time.
I've written about cotton floche before – you can read my most recent accolades of this thread here – but I've never actually discussed using the larger hanks of floche before now. Since some of you asked how to handle the large hanks, I thought I'd show you how I do it.
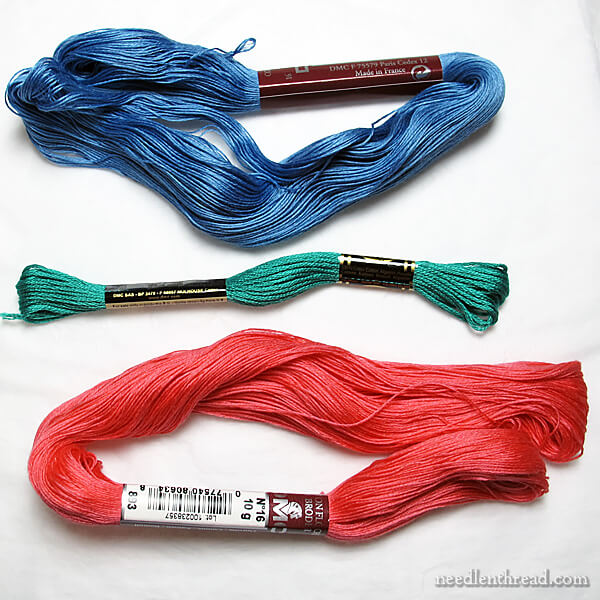
Normally, I buy floche in the smaller put-ups available from Hedgehog Handworks, but I also have a collection of frequently used colors in large skeins, too.
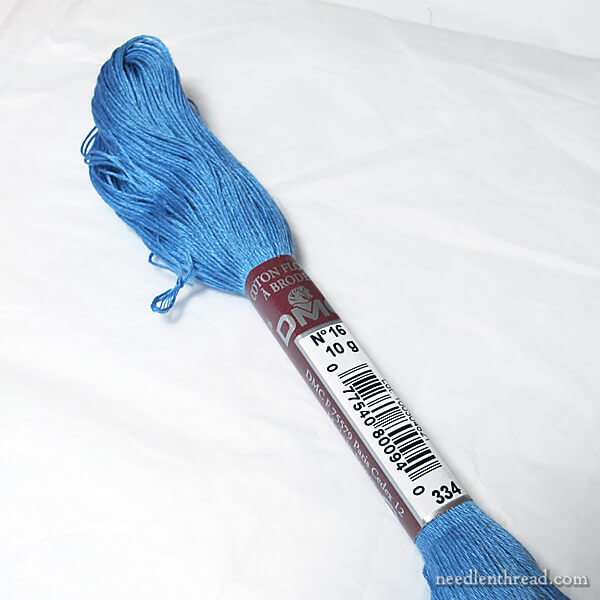
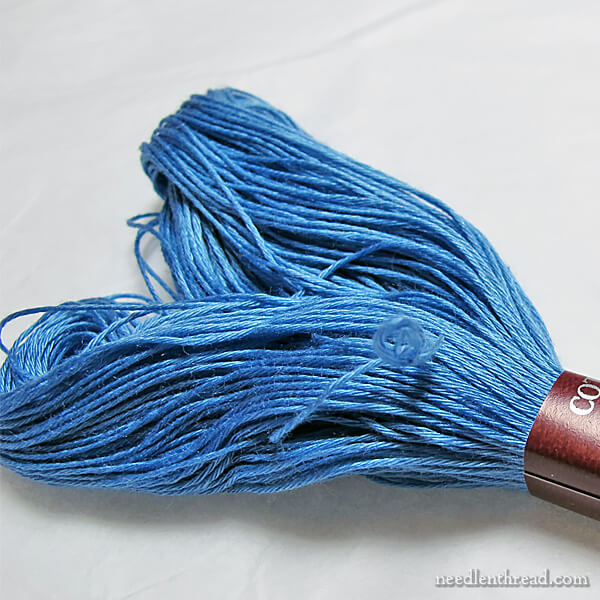
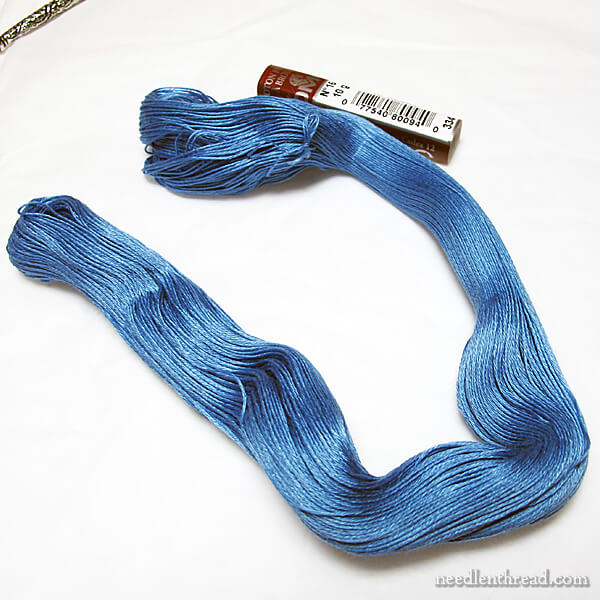
The hanks are pretty beefy, as you can see in the photo above. The center skein up there is a regular skein of DMC stranded cotton. Above and below are large hanks of floche.
It's Not a Pull Skein
The one thing to realize when facing a hank of floche is this:
Floche is not put up in a pull skein.
It's important to resist the temptation just to cut and pull on a thread end. If you do, you'll end up with a jolly mess.
So when it's time for me to cut into a large hank of floche, I go about it a special way. I prepare the skein ahead of time, so I can use it with ease and with as little mess and frustration as possible!
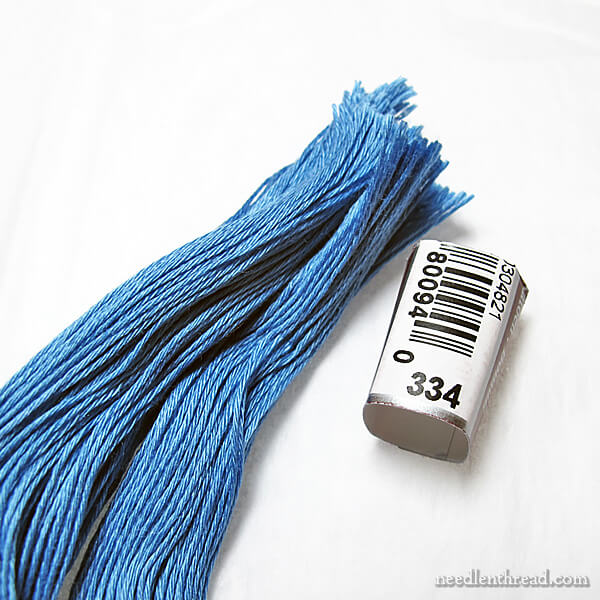
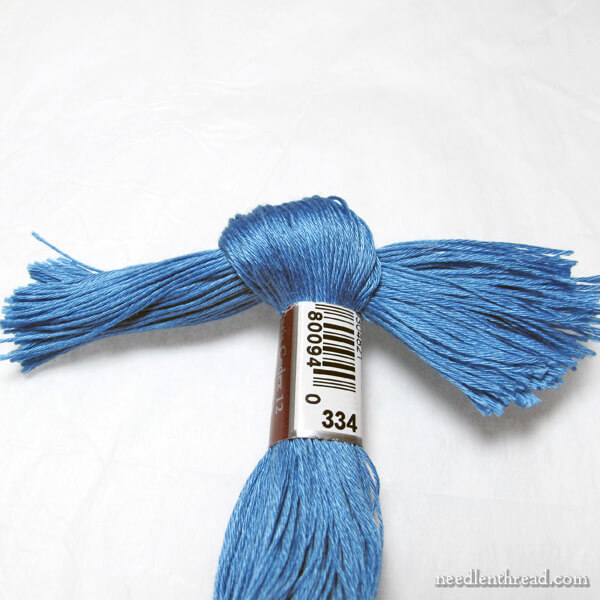
I start by examining the end of the hank nearer to the paper sleeve.
Find the Connection
Generally, thread manufacturers are consistent in the way a thread is put up and packaged. So, while there may be exceptions to individual skeins now and then, in general, the paper sleeve on a large hank of floche will be situated towards one end of the hank.
If you examine the short end of the hank extending beyond the sleeve, this is normally where you'll find the spot where the two ends of thread for the whole skein meet.
What you're looking for is a little slip knot.
If you can't see it right away, gently part the sections of the skein and look inside. Don't pull or anything – just look for the slip knot. It'll be a tiny loop of thread, tied up on itself.
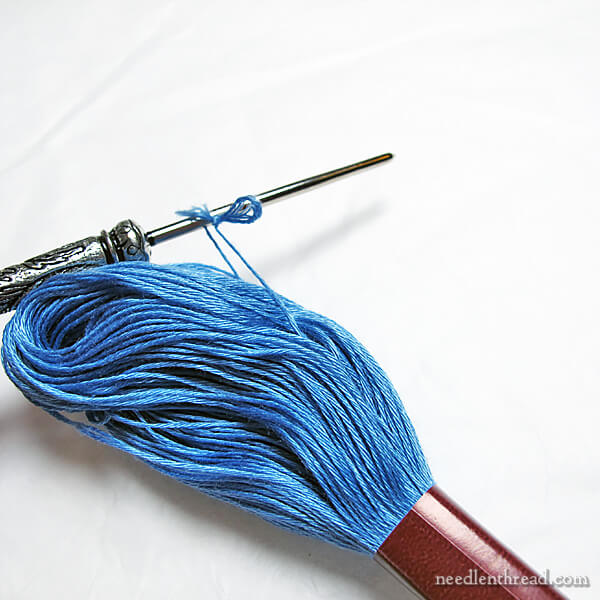
On this particular skein, the slip knot was easy to spot on the outside of the skein. You can see it there, held out by my laying tool.
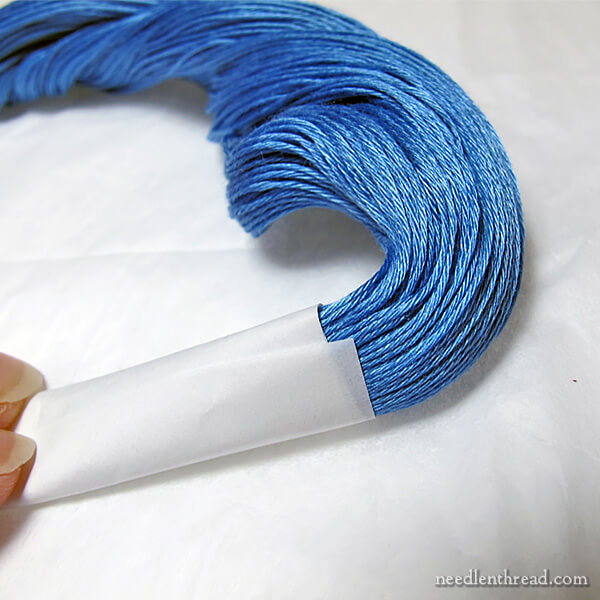
Open the Skein
Once you're certain of where that slip-knot loop is, slide the paper sleeve off the skein, so that you're working with a naked skein of floche.
Don't throw the paper sleeve away!
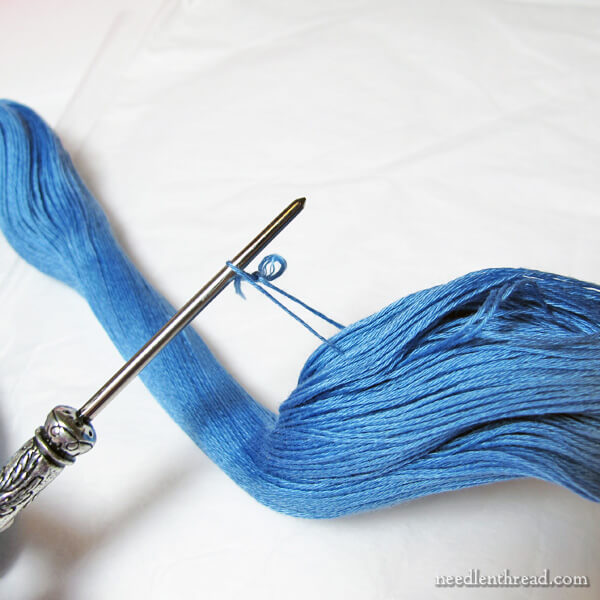
I usually use my laying tool to do this part, because I can slip it easily underneath the piece of thread involving the slip knot. But you can use your fingers, too!
Just grab that looped piece of thread, and gently…
…gently…
…pull on it.
It will separate out a "clump" of threads about a quarter the thickness of the skein.
When you're sure that you have all the threads in that clump smoothly situated together, pick up just that clump of threads enwrapped with the slip-knotted piece of thread that loops around it. Just pinch the separated clump and hold it all together.
Lift the skein up and gently shake it.
The skein will fall out into one huge loop.

The loop will look like this.
Cut & Divide & Cut
With a large skein of floche, pre-cutting your thread lengths is essential to managing the hank.
Floche is a soft thread, so shorter lengths are ideal. The longer the thread, the more likely it will lose its luster and weaken while you're stitching with it.
Dividing the hank up as directed below results in practically perfect lengths of floche for most stitching needs.
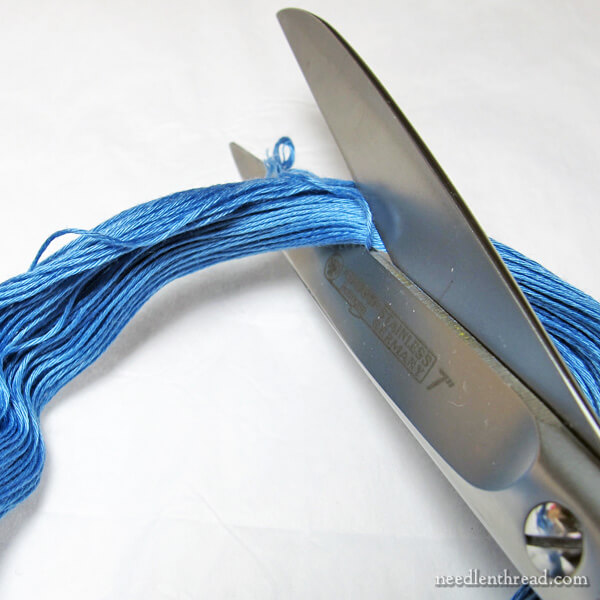
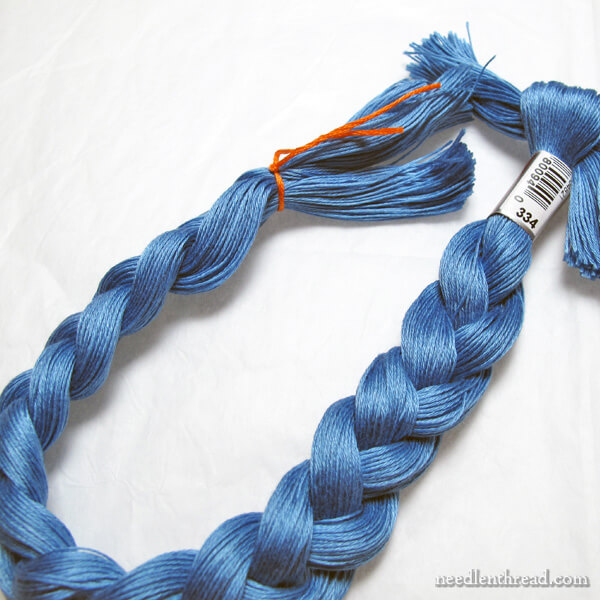
Cut the big loop right up next to the slip-knot thread, so that you're opening the whole loop into one very long collection of thread.
Then, fold the whole length into thirds. Cut the thread at each fold.
You'll end up up with three groups of floche, each about 18″ in length.
(Instead of folding into thirds, you can also measure 18″ and cut the thread, but you'll end up with one section slightly longer – by about an inch – than the other two.)
Tame It!
All those pre-cut lengths of thread need to be kept together somehow, or they're just going to end up in a mess, too.
So let's tame them!
Remember the paper sleeve you kept?
Cut the paper sleeve so that it's about 3/4″ long and has the color number on it, as shown above.
With the cut ends of all three groups of floche lined up neatly, wrap a small piece of scrap paper tightly around them.
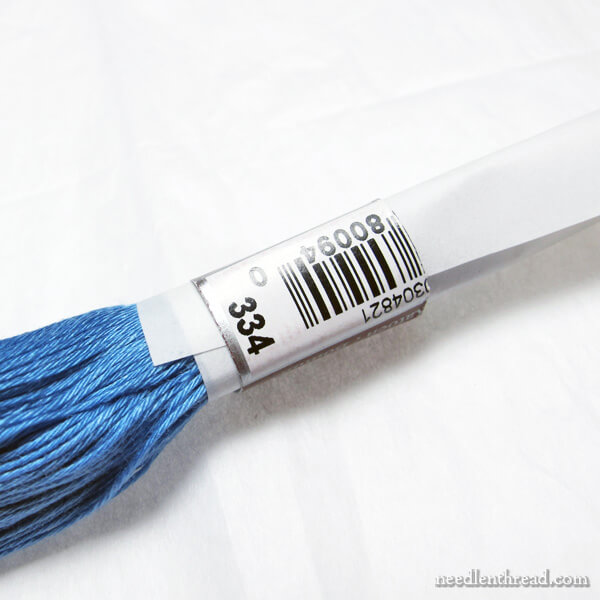
Feed the folded scrap paper with all the cut ends inside it through the small paper sleeve.
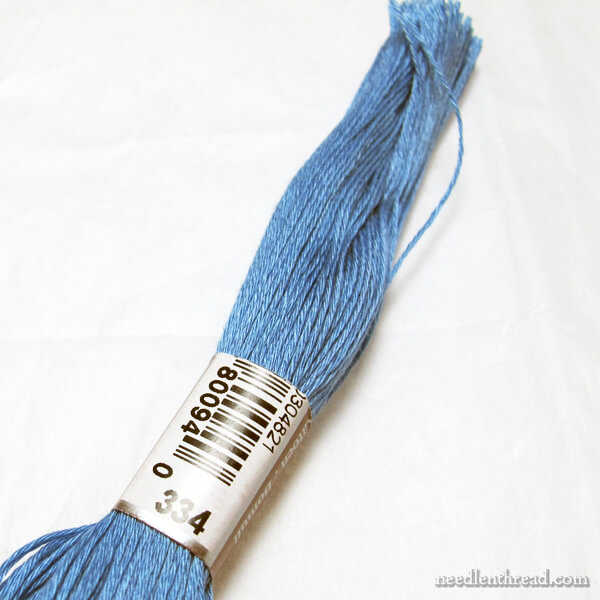
Pull the floche through, so a couple inches are sticking out beyond the sleeve.
Very gently, divide just the small extending inches of floche into two, and tie them (gently) into a not-too-tight overhand knot. This is just a simple knot, tied right on the end, on the short side of the sleeve.
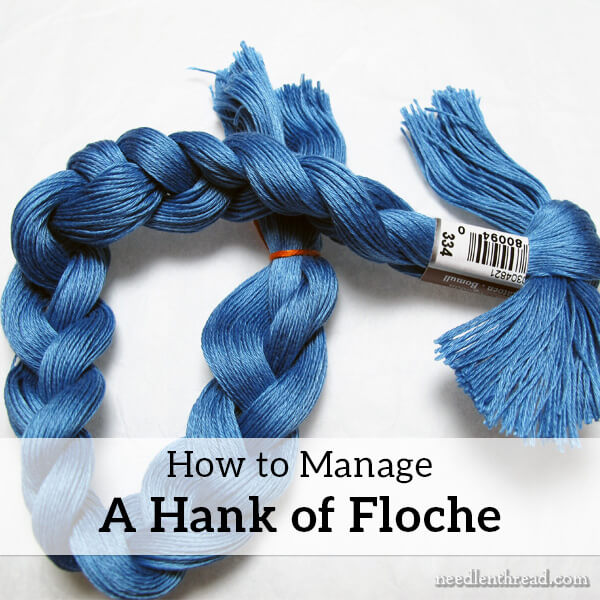
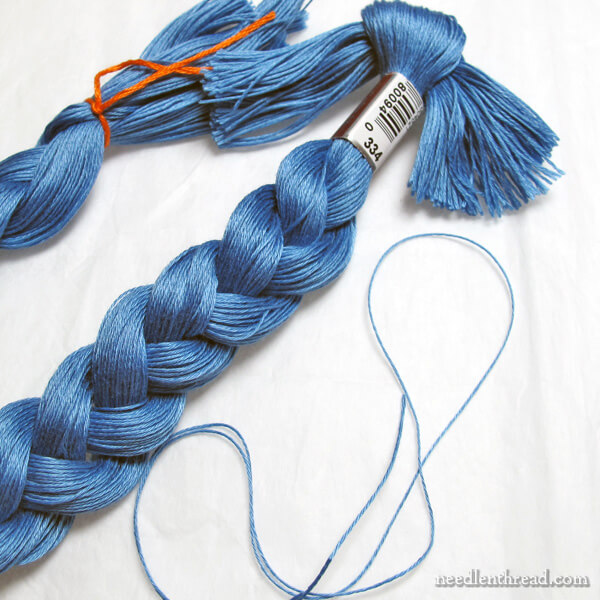
Then, take the three divisions of floche that are below the sleeve, and braid them into a not-too-tight braid.
To secure the end of the braid, use a contrasting color of thread or string tied in a slip knot, slipped around the end and pulled snugly.
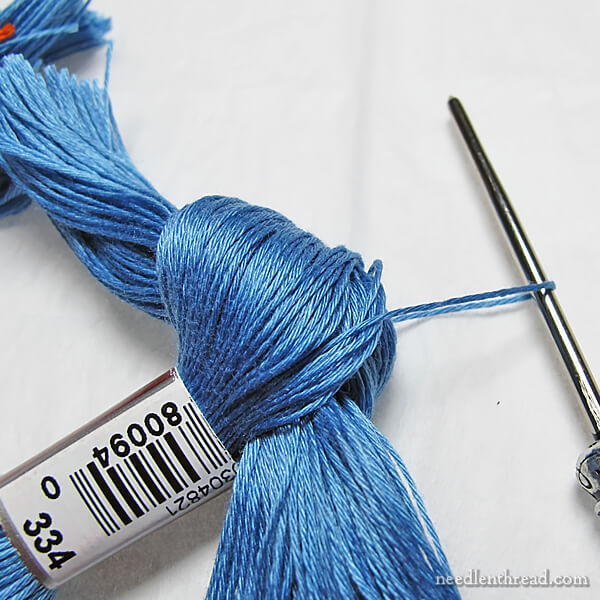
To remove a thread from the braid, slip the eye of your needle (or, in this case, I'm using a laying tool) under just one thread in the knot at the top of the sleeve and gently pull the whole thread out.
It comes right out and leaves the braid intact.
No knotty mess! No gnarled confusion of thread to tackle. Just a nice, neat braid!
As you use more and more floche from the braid, you might have to tighten the knot above the sleeve, re-braid the floche, and tighten the slip knot, but these are small considerations when it comes to keeping all the thread under control.
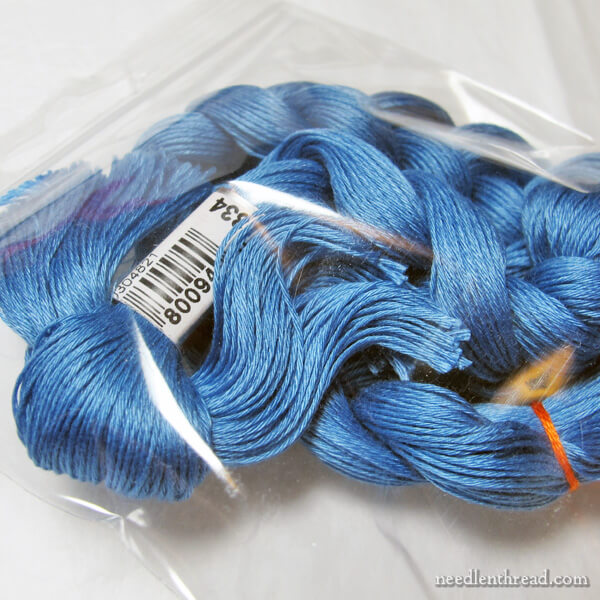
When I want to transport the floche with a project, I slip the whole braid into a small ziplock, to keep it clean and to keep the ends of the braid from getting fuzzy.
And that, my friends, is how to conquer a big skein of floche!
You can pretty much apply this concept to any put-up of embroidery thread that isn't in a pull skein.
Of course, if you like to pre-cut your threads from a regular pull skein, you can braid the pre-cut threads the same way.
And finally, if you have troubles with a regular pull skein of floss – if it tends to knot on you as you pull thread from it – you might find this article on unraveling the secrets of the pull skein helpful.
Have a terrific Tuesday!
Hank of Yarn Tied in a Big Knot
Source: https://www.needlenthread.com/2016/10/how-to-tame-a-big-hank-of-floche.html
0 Response to "Hank of Yarn Tied in a Big Knot"
Post a Comment